One of the most challenging jobs a beginning guitarist may undertake is to change guitar strings. But it’s not as difficult as it seems at first. So to do it on your own, check out our detailed article, all about changing guitar strings.
Make the necessary equipment purchase, and your playing will sound better.
5 Easy Steps to Change Guitar Strings
Changing the strings on your electric or acoustic guitar may seem difficult. You may have read or heard tough instructions from other guitarists about how challenging, time-consuming, or even hazardous it may be. But following this guide about changing guitar strings will be easy for you.
Anyways, since you are a musician, you should learn how to care for musical instruments.
So, follow the steps below to know precisely how to change a guitar’s strings.
So let’s get started with the fundamentals.
Step 1. Cut the existing strings
To avoid scratching your guitar, place it somewhere level, firm, and cushioned.
Once more, starting with the sixth string, the biggest and thickest, loosen each string at the guitar’s neck until it is slack. Again, you’ll know if the note doesn’t sound right when strumming.
You should be aware that the strings on your guitar are tight. If treated improperly, this might be hazardous.
Always be mindful that if they are not sufficiently loose when you try to remove them, they might ping off at any time!
When the string is loose, carefully cut it halfway between the nut and the straddle with the wire cutters. This is often at the 12th fret. Alternatively, you might relax and leave the bridge.
Step 2. Fretboard cleaning

All the outdated strings on the bridge should have been removed by now. Instead, a fretboard that is entirely bare should be in view.
You may either proceed directly to attach the new strings. Or you can clean and lubricate them first.
If the fretboard is dirty, especially in the area surrounding the frets, use some Steel Wool, 0000 Grade, to gently scrape it off. If you would like, you may use it to polish the frets until they are mirror-smooth.
Then, use a Planet Waves UNTREATED Cloth to remove the steel wool shards, and spray the fretboard with Dunlop 65 Cleaner. Finally, use a gentle scrubber and polisher to remove any remaining residue.
Step 3. Add the fresh strings
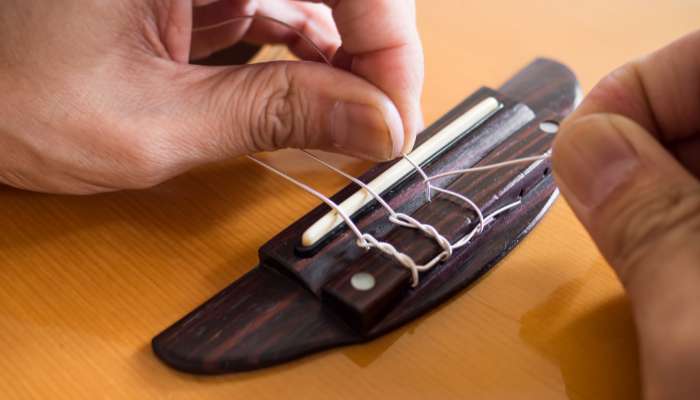
Once each ball end of the string is captured, feed your new strings through the bridge pins. With caution, thread the other end through the tuning peg’s hole without cutting your fingertips.
Pull the entire thread through until just 4-5 coils of string are left behind the peg. For all, save the lowest two strings. Then, you should be able to coil the string ends once more and put the end a second time in the peg hole.
Step 4. Wind the new string
Pull the string’s free end towards the direction of the guitar neck once you’ve fastened the bridge. Then, put it through the nut in the slot where the old string had been.
Once a hole is facing the nut on the tuning fork, wind it. Then, put the rope through that opening.
Give yourself plenty of slack in the string section between the bridge and the nut. As you want to wrap the string around the tuning machine for two to three complete revolutions.
One method for preventing this is to place your entire right arm or wrist underneath the string. Then gently hold the string in place with the index finger of your plucking hand.

- Initial Revolution
Holding the thread in place, wind it in an anticlockwise direction. While winding the tuning machine, ensure the end of the string you hold doesn’t move about.
Now carefully pass over the loose end that protrudes out of the other side of the machine. But, of course, it must be done by the end you are holding during the first revolution. But just for the first revolution!
- A Different Revolution
As the string tightens, you will (obviously) have to withdraw your hand from under it. Continue to be cautious to prevent the thread from flapping and unwinding.
Make sure the end you are holding goes beneath the string’s free end on all upcoming rotations.
Consequently, the piece of the string looped around the tuning peg will finish on top of the string you are holding.
As the string is tightened, it will rest on the nut and break off at an angle, resulting in a more dependable and secure string installation.
5. Cut and adjust
When you’ve finished with all of your strings, use wire cutters to trim any extra string sticking past the knobs, and use a tuner to adjust the pitch of your strings.
New strings sometimes take a few days to adjust to their correct pitch. So ideally, you didn’t alter them just before your major performance.
Conclusion
By now, you know all how to replace guitar strings, right? So, it’s time to apply the theory practically.
Remember, while you’re replacing the guitar string, tiny particles from your fingertips get into the string every time you play. These pollutants cause the string to corrode over time.
So for any such issue or other if you need to change the guitar strings, follow the steps mentioned in our article. Hopefully, they will help you.